What is provisioning? Provisioning is the process of registering and configuring a device over the network. Throughout this guide we will explain three methods to provision phones – Plug and Play, Auto Provision, and Manual Provision. Prior to provisioning a phone using either the Auto Provision or Manual Provision methods you will need to set up an extension within 3CX Web Management Console. You can also do this step prior to Plug and Play or as you are provisioning the device via Plug and Play.
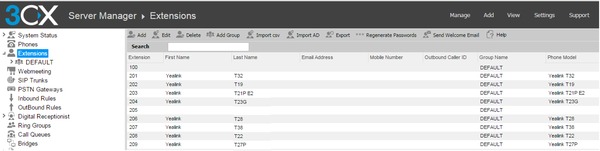
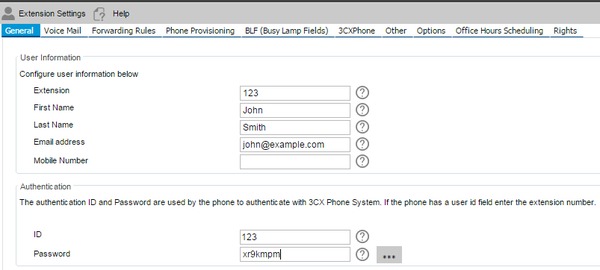
To set up an extension, login to 3CX Web Management Console and select Extensions on the left hand navigation pane. Click Add Extension and fill out information for the extension, passwords, and name – then apply your settings.
Plug and Play (PnP) is the easiest method for provisioning a phone. All of the device information is sent to the PBX using a multicast broadcast. The device will share information such as the MAC Address, IP and Model with 3CX Phone System for easier configuration.
To provision a phone using Plug and Play you need to plug the phone into the network and power it on. You will be able to see the new phone within the 3CX Web Management Console and it will display its information in bold, showing that it is un-provisioned. The phones will be listed under the phones tab on the left hand navigation menu.
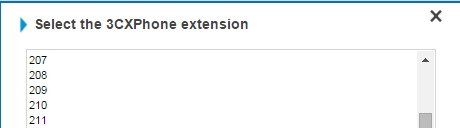
Verify that the MAC Address and IP address within 3CX match the phone that you have plugged in and would like to provision, and then you can either select “Add Extension” or “Assign Extension”. If you have already created an extension you can Assign the phone to the previously created extension with the option “Assign Extension”. If you have not created an extension yet, use the option “Add Extension” to creating the users extension. After assigning the phone to the proper extension, the phone will begin the provisioning process. When the device has downloaded its configuration and completed the boot cycle you have completed the provisioning process.
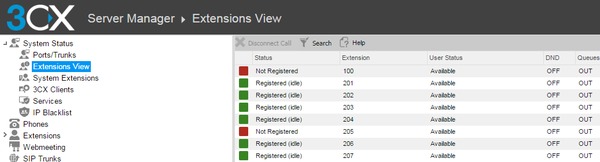
Please confirm the phone has successfully registered via the Extensions View Tab in 3CX. The “registered” indicator light for the extension will now be green. (See screenshots below)

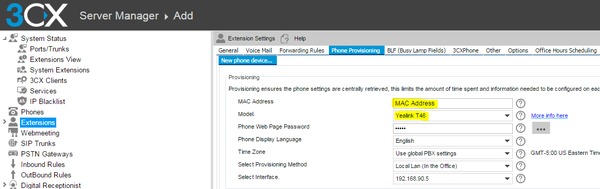
Auto-Provisioning will use the phones web interface to allow you to input the server URL where your configuration files are located. In order to use this process, the devices extension will need to be configured. Once you fill in the users details for the extension, please navigate to the phone provisioning tab. Here you will need to fill in the MAC Address of the device, then select the phone model. Once you apply these settings, a configuration file will be generated and stored in the provisioning web server.
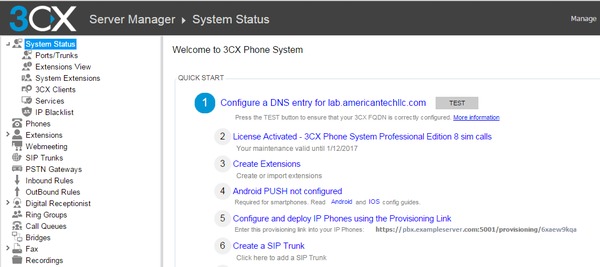
The URL needed to provision your device can be found on 3CX Web Management Console by clicking “System Status” and referencing Line #5 (Configure and deploy IP Phones using the Provisioning Link) You can copy and paste this link in the next steps.
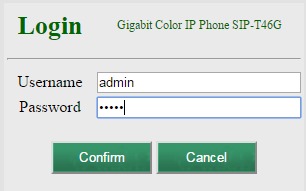
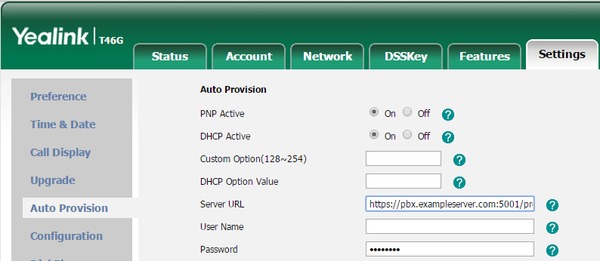
Once you have the URL for provisioning, please enter the Phone’s IP Address into your favorite web browser (Firefox, Chrome, Internet Explorer). Please keep in mind that the computer must be on the same local network as the phone in order to connect to the web interface of the phone. You will arrive at a login screen where both the default username and password is set to “admin” without quotes. After logging into the phone you will be able to navigate to the section for provisioning. On Yealink phones this can be found under Settings – Auto Provision. Enter the web address where the configuration files will be located (this was found on the previous step). After adding the URL to the phone, click “Auto Provision Now” and your phone will reboot shortly.
Please confirm the phone has successfully registered via the Extensions View Tab in 3CX. The “registered” indicator light for the extension will now be green. (See screenshot below)
Manual provisioning uses the phones web interface where you will need to manually input the extensions details. Within 3CX you will need to create an extension you would like to use for the new phone before you provision the phone. You also need to know the IP address of the 3CX Phone System as well as the IP address for the phone. Enter the phones IP address into your favorite web browser (Firefox, Chrome, Internet Explorer). The default username and password for the phone web interface is set to “admin” without quotes.
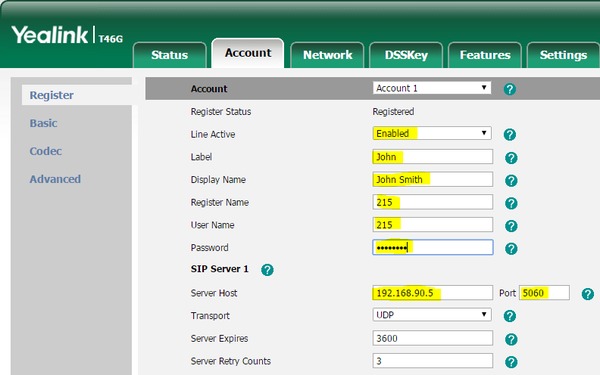
After logging into the phone, navigate to Account tab and select “Register”. You will then need to change the Line Active selection to Enabled (See screenshot below). You will also need to input the following information:
- Register Name – Extension
- User Name – Extension
- Password – Password provided while setting up the extension
- Server Host (3CX Server)
The settings that will be used for Caller ID and Line Keys are:
- Label – This shows on the phones main screen as a line key
- Display Name – This appears on the caller ID when making internal outbound calls
Upon applying these settings your phone will begin to provision and will reboot shortly and the registration status will change from Disabled to Registered.

Please confirm the phone has successfully registered via the Extensions View Tab in 3CX. The “registered” indicator light for the extension will now be green. (See screenshot below)
Steve Stoveld
Comments